|
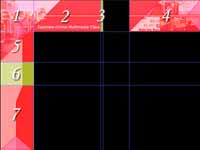
The image below demonstrates, with a color code, how I would break this image
up. The red colored sectors would be made in to regular images inserted in
to the table. The yellow colored areas would be made in to background images.
All of the blacked out areas would not be made in to images at all and would
simply just be background colors on the design (they can be matched in the
color table in Photoshop).
| Image |
 |
| Click on the thumbnail to enlarge... |
The way I generally break up the images in Photoshop (especially when it's
an image across multiple layers) is I highlight the area I want to make in
to its own image, and then I go to Edit->Copy Merged. Now, when you
create a new image in Photoshop, it should automatically be sized to the selection
in the Clipboard from when you copied.
Be aware that it is important to eye the sizes of images so that they can
be aligned correctly in tables. In the example we use, our furthest left dimension
of the table has a fixed width of 130 pixels. Therefore, all images for that
dimension should be exactly 130 pixels wide.
Here's a breakdown of how I would pull "Image 1" from the example
above:
| Image |
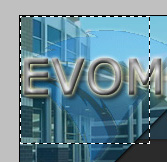 |
Here I highlighted the image in Photoshop.
| Image |
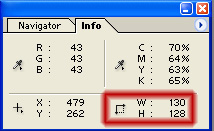 |
At the same time, I was eyeing my Info box (set to Pixel units). Later on,
both image width and image height will have to be exact with some images in
order to fit our tables properly.
| Image |
 |
Last, we use Edit->Copy Merged and then go File->New and
click OK. Next, Edit->Paste and then save the image under its own
name. The first image of the design has now been seperated from the rest.
Back to Page 1 | On to Page 3
|